How and when to repot my bonsai!
Claude Savard
CSCeramique
One of the main concerns for beginners is often "How and when to repot my bonsai". This step is of crucial importance, as the tree's survival depends on it. So it's essential to understand how and when to repot your bonsai to ensure your tree's well-being and optimum development.
The essence of the art of bonsai lies in active observation. By carefully scrutinizing the evolution of trees, you can discern the subtle changes that take place throughout the year. It's through this meticulous observation that you develop the confidence essential to guiding your bonsai's future.
When to repot my bonsai ?
Repotting your bonsai at the right time can be a challenge, since the answer depends largely on where you live. It's inappropriate to set precise periods in weeks or months, saying, for example, that to perform this or that action, you must do it during the second week of May. Temperatures vary considerably from one latitude to another, and even from one city to another. In order to provide more general and relevant information for all readers, I'm going to deal with this question on a seasonal basis.
Repotting rustic and semi-hardy trees.
Wintering outdoors.

It's best to repot hardy bonsai in spring. It's at this time that the trees begin a marked activity in their buds, marking the start of sap circulation inside the tree. This period, which can vary from one to three weeks depending on the species, corresponds to the swelling of the buds. It should be noted that each species has its own characteristics, with deciduous trees reacting differently to conifers. What's more, within each species, each variety exhibits distinct specificities.
Wintering in a cold greenhouse.

Photo montage CSCeramique
For amateurs who keep their bonsai indoors in a cold greenhouse, where the temperature is carefully controlled between 1° and 5° degrees Celsius, repotting can be carried out in winter, provided the trees are not exposed to frost, i.e. temperatures do not drop below 0° degrees Celsius. However, hobbyists must follow the same recommendations regarding tree recovery, even if this occurs earlier than in the case of exclusively outdoor culture. In this context, it's essential that they gradually adjust the temperature of their greenhouse, as the effect of the sun inside will encourage the trees to bud earlier.
Repotting tropical trees.
In my climate, tropical trees are kept indoors during the cold seasons. These trees are grown outdoors from early spring to late summer, to protect them when night-time temperatures drop below 10° Celsius.
Recovery of tropical trees is apparent from mid to late winter. Once a bonsai tree has recovered well, you can repot it using the same techniques as for the other trees in your collection. Early summer is another favourite time of year. Some enthusiasts choose this period because of the higher temperatures and longer sunny days. With tropical trees, you benefit from a much longer potting period.
How to repot my bonsai ?
Repotting a bonsai is of crucial importance, as it preserves the rootlets necessary for the tree's nutrition, while eliminating overgrown secondary roots. This process helps to reduce the size of the tree, known as nanification.
Repotting frequency varies according to species and tree vigour. A young tree can be repotted every two or three years, depending on its growth. On the other hand, for older trees in the maintenance phase, repotting can be carried out every five years, or even more frequently according to the advice of certain Japanese masters.
It's essential to plan your work on your bonsai so as not to stress it unnecessarily. Normally, only one major operation should be carried out on your tree during its growing season. You may choose to carry out a repotting operation, make major ligatures or perform major bending.
Clues as to the right time to repot.
Larch trees are generally repotted in spring, for a very short period. It may take a few days, or even one or two weeks, depending on the species. It is essential to carry out repotting before the buds have fully opened. In regions where spring temperatures can drop below 0°Celsius, it is important to ensure that newly repotted trees do not freeze.
American larch / Larix laricina
This operation should be carried out when the buds start to swell and take on a beige hue, until the first needles appear.
According to many professionals, this time frame offers the best chances of tree recovery.
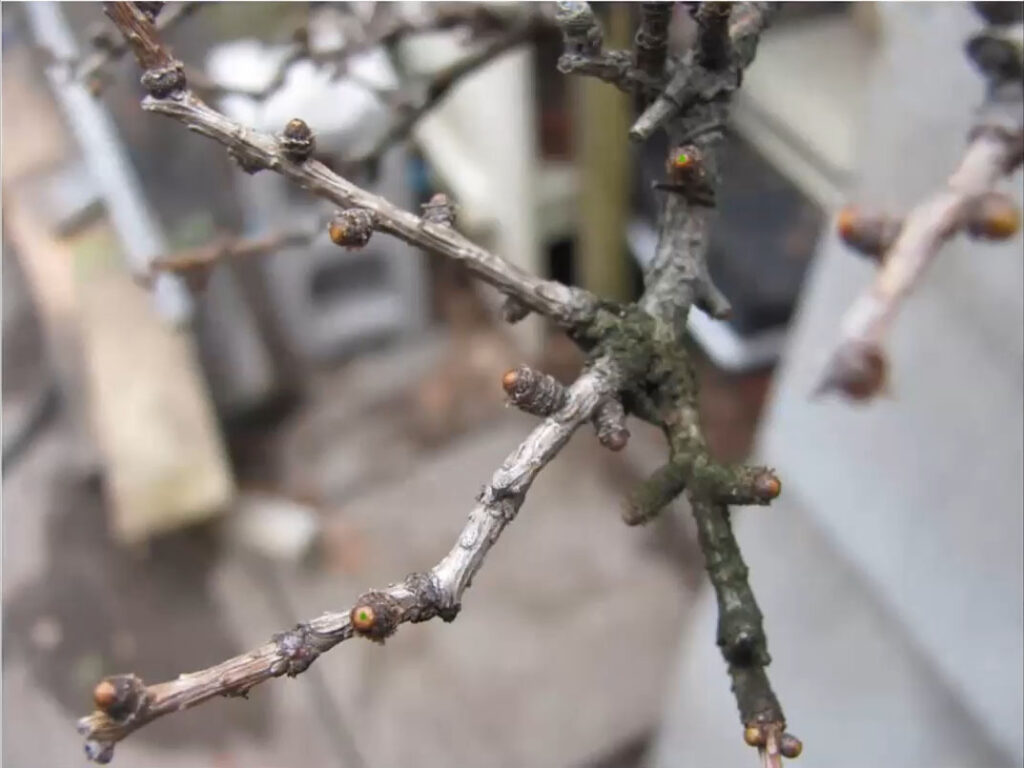
This image shows the buds opening on a Chinese elm. The buds are just beginning to open, marking the start of the repotting period for many deciduous trees. This period can last until the first leaves appear.
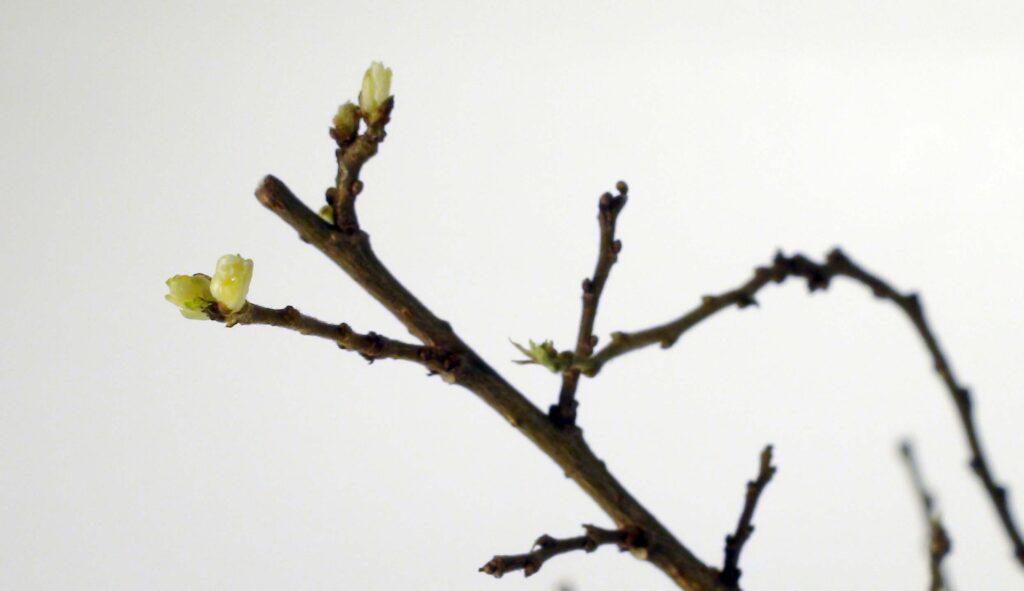
Chinese elm / Ulmus parvifolia
Repotting an American larch. (Larix laricina)
Here are a few steps to make the repotting process easier:
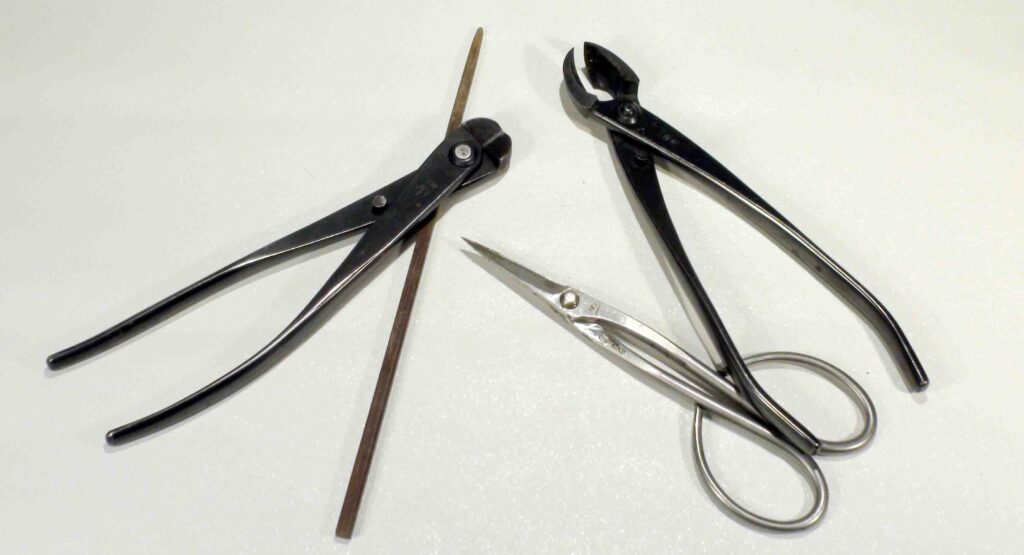
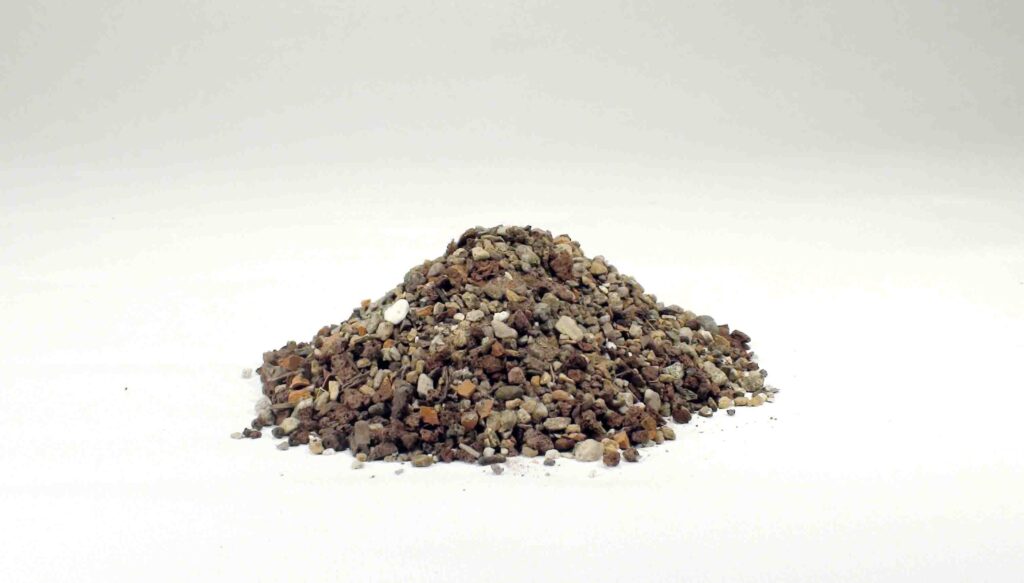
1. Prepare the substrate and all the tools required for repotting.
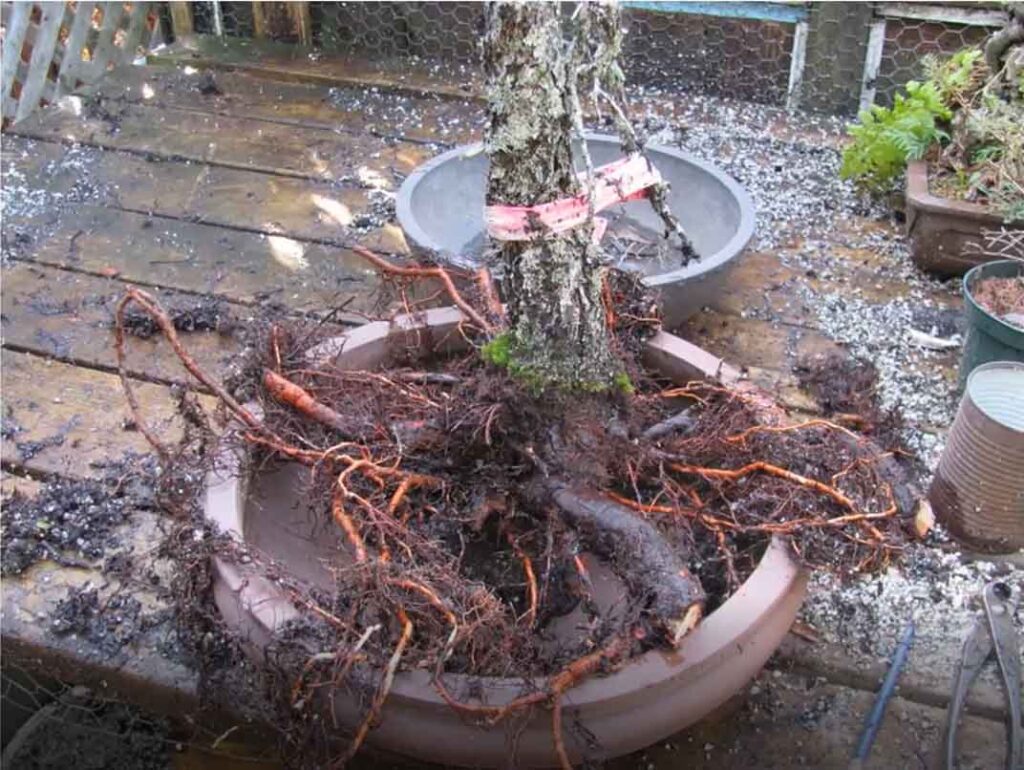
2. Carefully remove the tree from the pot and check the condition of its roots. Use a chopstick to remove the old substrate, starting from the sides. If necessary, cut any roots that are too long or too large.
3. Prepare the pot for the tree. Make sure you have a grid and inking wire available.
4. Add a layer of substrate to the bottom of the pot and form a small mound under the tree to position the substrate correctly.
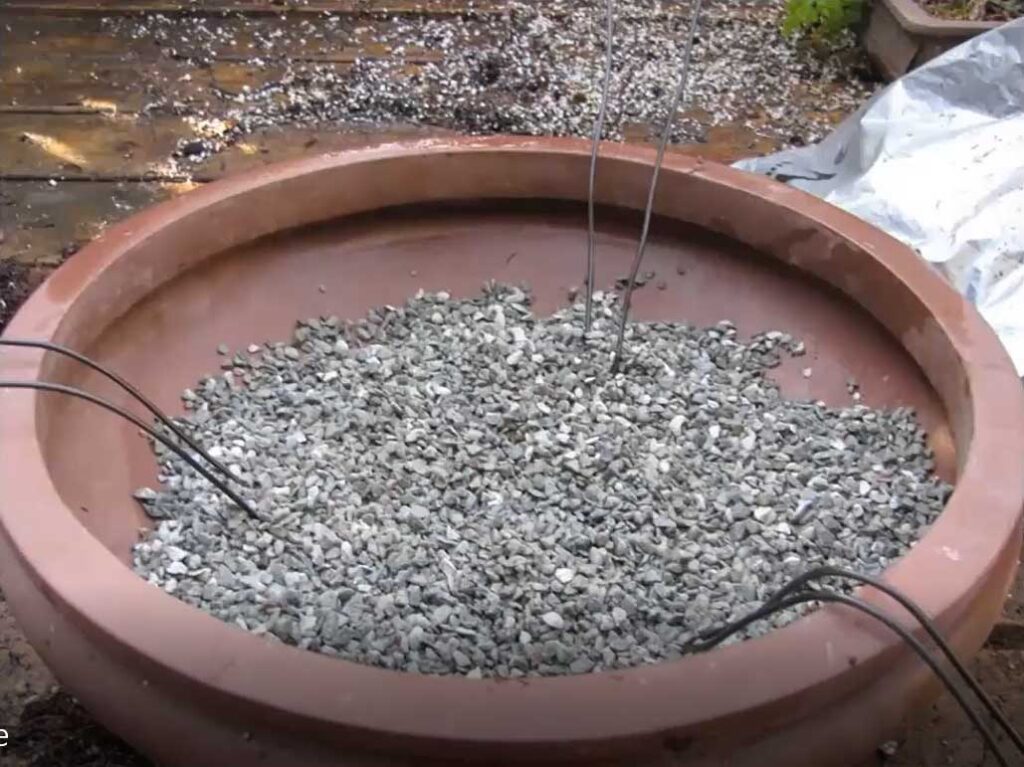

5. Secure the tree in the pot using the anchoring wires.
6. Start placing the substrate in layers in the pot, making sure that the substrate penetrates well between the roots.
7. Use a chopstick to make circular movements in the substrate, to ensure even distribution and eliminate air holes.
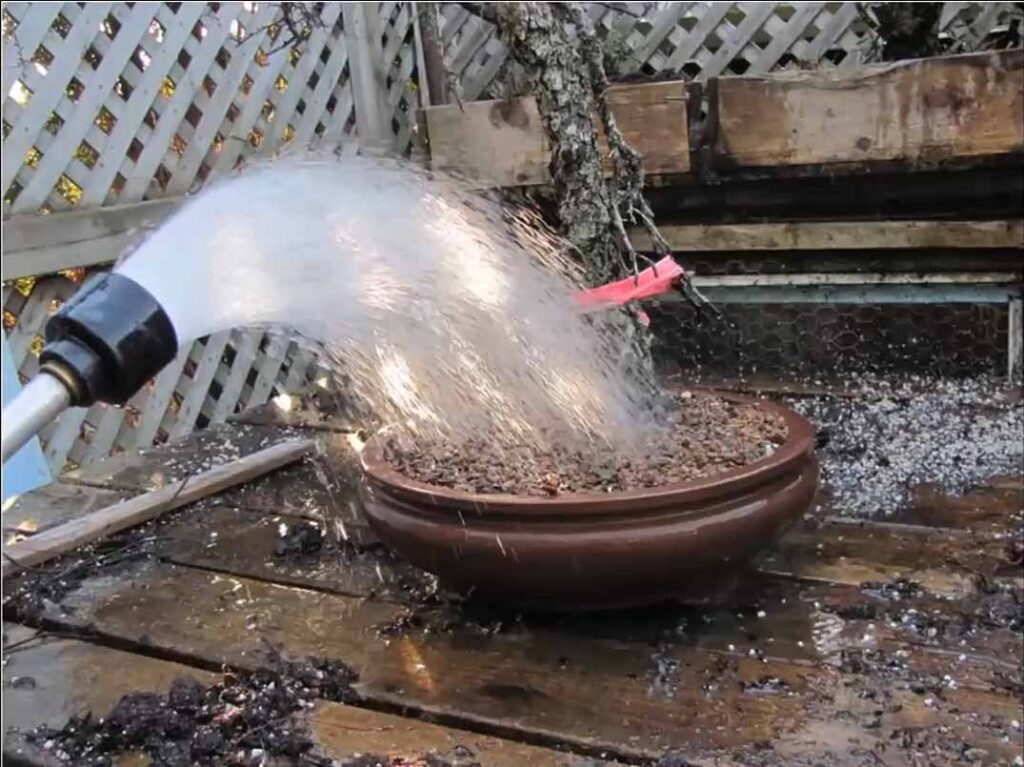
8. After repotting, water the tree thoroughly.
9. Check regularly in the days and weeks that follow to make sure the tree is recovering properly.